 |
| Tabs in HTML and CSS |
Hello friends, today in this blog we will learn how to create a tabs using only HTML and CSS. In the earlier blog we learn Learn how to make a tab slider using HTML CSS and JavaScript.
So Here is the code and my work. I hope you are gonna love this and share whit your friends too. So let's Start learning tab slider using HTML CSS and JavaScript | tab slider using HTML CSS and JavaScript - html css from scratch. So Let's start..
I hope you enjoyed this video tutorial. If you had any doubts, then please comment them below. And if you enjoyed this tutorial, then please hit the like button below and subscribe my channel. Thank you..
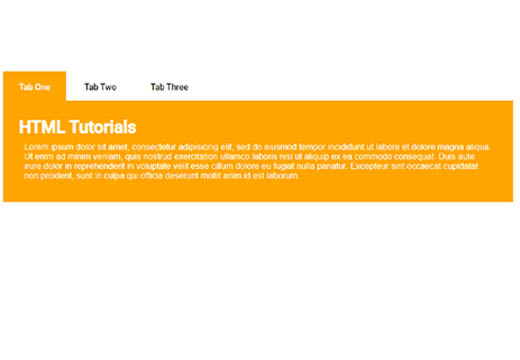
How To Create a tabs using only HTML and CSS | Make Tabs in HTML and CSS Design
Learn how to Make Tabs using HTML CSS - Create Tabs design using HTML and CSS.
In this tutorial you will learn to create a tabs using only HTML and CSS coding, subscribe E-CODEC channel to watch more videos on website designing tutorials for beginners.
STEP 1: Open any code editor
STEP 2: Create a index.html file with html extension
Create a new file index.html, Here is the code
 <!DOCTYPE html>
 <html>
 <head>
      <meta charset="utf-8">
      <title>How to make tabs on a website using html and css only step by step</title>
      <link rel="stylesheet" type="text/css" href="style.css">
 </head>
 <body>
 <ul class="main">
      <li>
           <input type="radio" name="tab" id="label-1" checked>
           <label for="label-1">Tab One</label>
           <div class="content">
                <h1>HTML Tutorials</h1>
                <p>Lorem ipsum dolor sit amet, consectetur adipisicing elit, sed do eiusmod
                tempor incididunt ut labore et dolore magna aliqua. Ut enim ad minim veniam,
                quis nostrud exercitation ullamco laboris nisi ut aliquip ex ea commodo
                consequat. Duis aute irure dolor in reprehenderit in voluptate velit esse
                cillum dolore eu fugiat nulla pariatur. Excepteur sint occaecat cupidatat non
                proident, sunt in culpa qui officia deserunt mollit anim id est laborum.</p>
           </div>
      </li>
      <li>
           <input type="radio" name="tab" id="label-2">
           <label for="label-2">Tab Two</label>
           <div class="content">
                <h1>CSS Tutorials</h1>
                <p>Lorem ipsum dolor sit amet, consectetur adipisicing elit, sed do eiusmod tempor incididunt ut labore et dolore magna aliqua. Ut enim ad minim veniam quis nostrud exercitation ullamco laboris nisi ut aliquip ex ea commodo
                consequat.</p>
           </div>
      </li>
      <li>
           <input type="radio" name="tab" id="label-3">
           <label for="label-3">Tab Three</label>
           <div class="content">
                <h1>JavaScript Tutorials</h1>
                <p>Lorem ipsum dolor sit amet, consectetur adipisicing elit, sed do eiusmod tempor incididunt ut labore et dolore magna aliqua. Ut enim ad minim veniam, quis nostrud exercitation ullamco laboris nisi ut aliquip ex ea commodo consequat. Duis aute irure dolor in reprehenderit in voluptate velit esse cillum dolore eu fugiat nulla pariatur. Excepteur sint occaecat cupidatat nonproident, sunt in culpa qui officia deserunt mollit anim id est laborum.</p>
           </div>
      </li>
 </ul>
 </body>
 </html>
STEP 3: Create a style.css file with CSS extension
Create a new file style.css, Here is the code
 @import url('https://fonts.googleapis.com/css2?family=Roboto:wght@300;500&display=swap');
 *{
      padding: 0;
      margin: 0;
      box-sizing: border-box;
      font-family: 'Roboto', sans-serif
 }
 .main{
      width: 70%;
      height: 400px;
      margin: 100px auto;
      position: relative;
 }
 .main li{
      display: inline-block;
 }
 .content{
      background: orange;
      color: #fff;
      position: absolute;
      left: 0;
      display: none;
      padding: 30px;
      top: 35px;
 }
 .content>p{
      font-size: 1em;
      font-weight: 300;
      margin: 10px;
 }
 .main [id^="label"]:checked~.content{
      display: block;
 }
 .main input[type="radio"]{
      display: none;
 }
 .main label{
      padding: 20px 30px;
 }
 .main [id^="label"]:checked + label{
      background-color: orange;
      color: #fff;
 }
I hope you enjoyed this video tutorial. If you had any doubts, then please comment them below. And if you enjoyed this tutorial, then please hit the like button below and subscribe my channel on YouTube. Thank you..


0 Comments