 |
| Display data from MySQL Database using PHP |
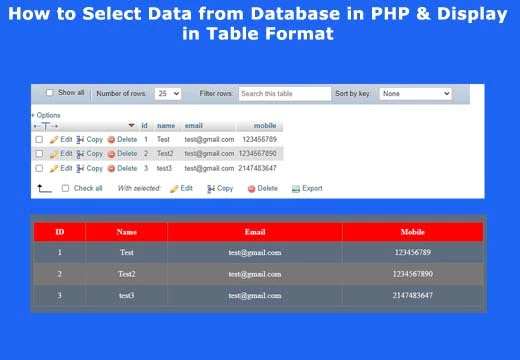
In this video tutorial, we will learn How to Fetch Data From Database in PHP And Display HTML Tables. In previous blog tutorials we learn How to insert data into MySQL Database Table Using PHP | E-CODEC
I'm happy to post here my insight and methods utilized in PHP and MySQL. As you all mindful that PHP and MySQL are the most broadly utilized open source for sites. the present great many sites and application are utilizing these free software's.
Actually I feel that this could be next level for front end developer by utilizing PHP and MySQL a HTML designer can make a site more unique. Allow us to talk about How to Fetch data from database using PHP MySQL, Its straight forward and exceptionally valuable for an essential site dynamic client dynamic enlistment.
Each innovative can execute its essential construction to their site. Presently Just follow these basic advances and you will find that your first dynamic functional PHP registration form with database connection entry on every form fill up.
So here is the code and my work. I hope you are gonna love this and share whit your friends too. So let's start learning How to Fetch data from database using PHP MySQL from scratch. So let's start.
In this tutorial you will learn to Display data from MySQL Database using PHP coding, subscribe E-CODEC channel to watch more videos on website designing tutorials for beginners.
I hope you enjoyed this video tutorial. If you had any doubts, then please comment them below. And if you enjoyed this tutorial, then please hit the like button below and subscribe my channel. Thank you..
Fetch data from database using PHP
In this tutorial you will also see How to create Database and Tale. First we need a server like (XAMPP, WAMP) one local server required for running PHP Script because PHP is a Server Site Scripting Language. I hope you all are installing local server, so let’s start creating Database and Database Table. Second thing you start the local server, I have using XAMPP server, you can use another one also.

Open any browser in computer and type in url 127.0.0.1/phpmyadmin and press enter you find a option Database click here and time Database and in my case database name is tutorials you can take any other name also. In side menu ypu can find your Database name ‘tutorials’ click on it. Now you see new option click on it and you see create table field where type table name in my case table name is insert_data . You can paste code in the SQL, Here code given below. For more details watch my video.
Video Tutorial
STEP 1: Create HTML Table (Front end code)
Create a new file index.php, Here is the code
 <!DOCTYPE html>
 <html>
 <head>
      <meta charset="utf-8">
      <title>How to Select Data from Database in PHP & Display in Table Format</title>
      <style type="text/css">
           *{
                padding: 0;
                margin: 0;
                box-sizing: border-box;
           }
           body{
                width: 100%;
                min-height: 100vh;
                background-color: #5d6d7d;
           }
           .container{
                max-width: 900px;
                margin: 100px auto;
                width: 100%;
           }
           table{
                border-collapse: collapse;
                width: 100%;
           }
           table th{
                background-color: red;
                color: #fff;
                padding: 10px;
           }
           table td{
                padding: 12px;
                color: #fff;
                font-size: 1em;
                text-align: center;
           }
           table tr:nth-child(odd){
                background-color: #797676;
           }
      </style>
 </head>
 <body>
 <div class="container">
      <table border="1">
           <tr>
                <th>ID</th>
                <th>Name</th>
                <th>Email</th>
                <th>Mobile</th>
           </tr>
           <?php
                if ($num>0) {
                     while($data=mysqli_fetch_assoc($connect)){
                          echo "
                               <tr>
                               <td>".$data['id']."</td>
                               <td>".$data['name']."</td>
                               <td>".$data['email']."</td>
                               <td>".$data['mobile']."</td>
                               </tr>
                          ";
                     }
                }
           ?>
      </table>
 </div>
 </body>
 </html>
STEP 2: For Database connectivity using MySQL
Make a connection.php file for stablished connection database use that default code as below
 $conn=mysqli_connect("localhost","root","","tutorials"); //database connection
 //hostname, username, password, database name
 if ($conn) {
      echo "Connection successfully";
 }else{
      echo "Error";
 }
STEP 3: Finally make a login page with login.php extension
From get value of all fields shown in HTML page
 <?php
 $conn=mysqli_connect("localhost","root","","tutorials"); //database connection
 //hostname, username, password, database name
 if ($conn) {
      echo "Connection successfully";
 }else{
      echo "Error";
 }
 //check database connect or not
 $query="select * from data_insert";
 $connect=mysqli_query($conn,$query);
 $num=mysqli_num_rows($connect); //check in database any data have or not
 ?>
 <!DOCTYPE html>
 <html>
 <head>
      <meta charset="utf-8">
      <title>How to Select Data from Database in PHP & Display in Table Format</title>
      <style type="text/css">
           *{
                padding: 0;
                margin: 0;
                box-sizing: border-box;
           }
           body{
                width: 100%;
                min-height: 100vh;
                background-color: #5d6d7d;
           }
           .container{
                max-width: 900px;
                margin: 100px auto;
                width: 100%;
           }
           table{
                border-collapse: collapse;
                width: 100%;
           }
           table th{
                background-color: red;
                color: #fff;
                padding: 10px;
           }
           table td{
                padding: 12px;
                color: #fff;
                font-size: 1em;
                text-align: center;
           }
           table tr:nth-child(odd){
                background-color: #797676;
           }
      </style>
 </head>
 <body>
 <div class="container">
      <table border="1">
           <tr>
                <th>ID</th>
                <th>Name</th>
                <th>Email</th>
                <th>Mobile</th>
           </tr>
           <?php
                if ($num>0) {
                     while($data=mysqli_fetch_assoc($connect)){
                          echo "
                               <tr>
                               <td>".$data['id']."</td>
                               <td>".$data['name']."</td>
                               <td>".$data['email']."</td>
                               <td>".$data['mobile']."</td>
                               </tr>
                          ";
                     }
                }
           ?>
      </table>
 </div>
 </body>
 </html>
Here a Front end developer can keep in touch with some own code in PHP, Read the code and comprehend this essential design line by line you will think that its extremely simple.
Conclusion
By following bit by bit strategy gave over a fundamental login form can be made. So best of luck for your first PHP code.
You can also learn:- How to insert data into MySQL Database Table Using PHP


1 Comments
how to remove the successfully in upper part
ReplyDelete